Craving a taste of Thailand? Look no further than this authentic Thai chicken curry recipe, a vibrant and flavorful dish that will transport your taste buds straight to the bustling street markets of Bangkok. Forget bland, watery curries; this recipe delivers a rich, creamy sauce bursting with the fragrant aromas of lemongrass, galangal, and kaffir lime leaves. We'll explore the essential ingredients and techniques that make this curry truly special, ensuring a delicious meal even for novice cooks. The authentic flavors come from carefully balancing sweet, sour, salty, and spicy notes.
This recipe is designed to guide you through each step, from preparing the aromatic curry paste to achieving the perfect balance of flavors in the rich coconut milk sauce. Get ready to tantalize your taste buds with this unbelievably delicious and easy-to-follow guide. Let's dive into the step-by-step process to create your own masterpiece of Thai culinary artistry.
Tools Needed
- Pan
- Bowl
Ingredients
- Chicken thighs
- Vegetable oil: moderate
- Onion: 1 large
- Instant noodles
- Coconut milk: 100-150 ml (initial), 300 ml (approx. total)
- Curry paste (yellow curry paste): 3-4 tablespoons + 1/2 tablespoon duck curry paste
- Potatoes
- Salt: 1/4 teaspoon
- Coconut sugar: 1 tablespoon
- Fish sauce: 1 tablespoon
- Water
Step-by-Step Instructions
Step 1. Preparing the Chicken and Aromatics
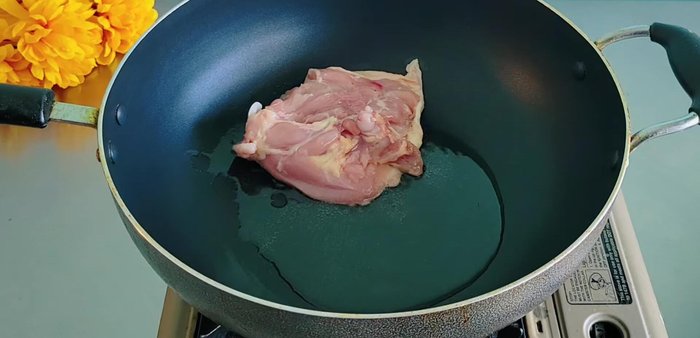
- Grill chicken thighs in a pan with moderate vegetable oil over medium heat until yellow. Set aside.
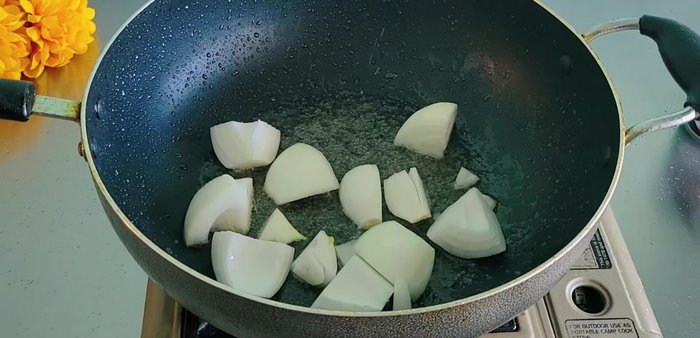
- Stir-fry 1 large onion (cut into large pieces) until translucent. Set aside.
Step 2. Building the Curry Base
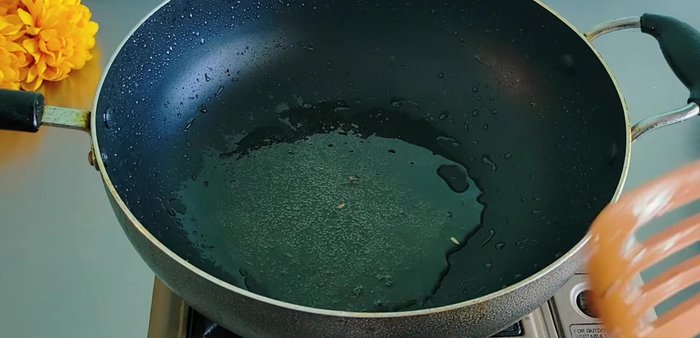
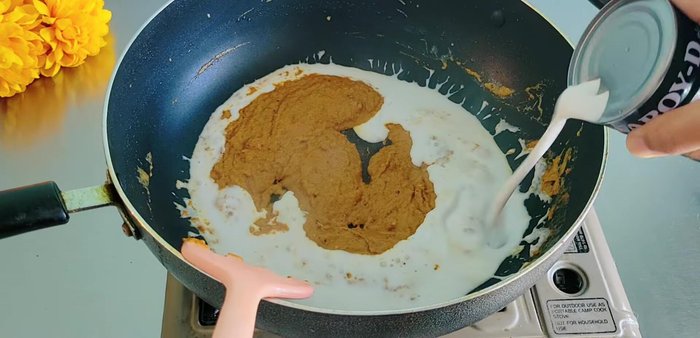
- Add instant noodles to the remaining oil in the pan, remove and discard the noodles. Add 100-150ml coconut milk.
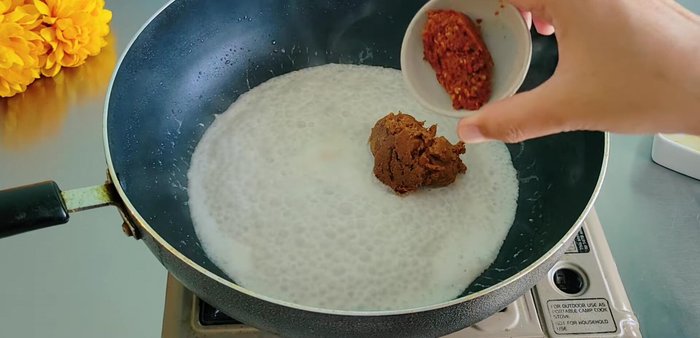
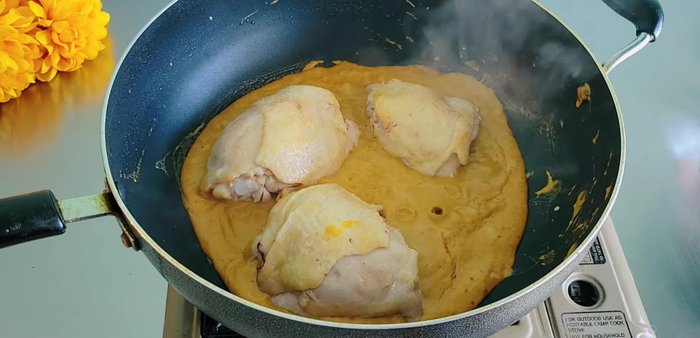
- Bring coconut milk to a boil, then add 3-4 tablespoons of yellow curry paste and 1/2 tablespoon of duck curry paste for color. Stir-fry until thickened.
- Gradually add remaining coconut milk (approx. 300ml) and stir well until boiling again.
Step 3. Combining Ingredients and Simmering
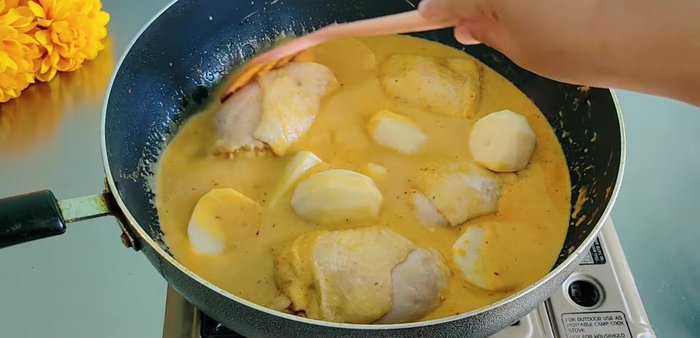
- Add the grilled chicken to the curry.
- Add potatoes (cut into small pieces), fried onions, salt (1/4 teaspoon), coconut sugar (1 tablespoon), and fish sauce (1 tablespoon).
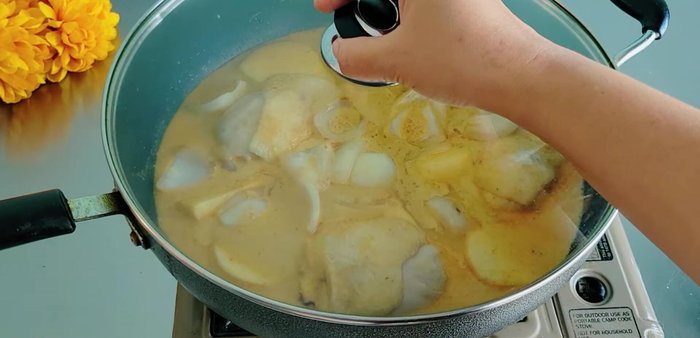
- Simmer over medium-low heat for 30 minutes with the lid on, stirring occasionally.
Step 4. Final Adjustments
- Adjust water level as needed; the curry should be reduced after 30 minutes.

Read more: Easy Ground Beef Curry: A Delicious Asian Home-Style Recipe
Tips
- Grilling the chicken first firms the meat and reduces the smell.
- Use fresh coconut milk for a richer flavor.
- Look for yellow curry paste for best results.
- Adjust seasoning to taste, but the curry paste itself often provides ample flavor.
Nutrition
- N/A
FAQs
1. Can I substitute coconut milk?
While coconut milk is essential for authentic flavor and creaminess, you can try using a combination of chicken broth and heavy cream as a substitute. However, the taste will differ significantly.
2. How spicy is this recipe?
The spiciness is adjustable. Start with less chili and add more to your preference. You can also remove the seeds from the chilies for a milder curry.
3. Can I make this curry ahead of time?
Yes! This curry tastes even better the next day. Store leftovers in an airtight container in the refrigerator for up to 3 days.
With this recipe, you've unlocked the secrets to creating a truly authentic Thai green chicken curry. Enjoy the rich, fragrant flavors and the satisfaction of preparing this delicious dish from scratch. Now go forth and impress your friends and family with your newfound Thai culinary skills!